Monday 12 December 2011

Evaluation

Evaluation of Animation

Discussion

Overall, the animation did fit to the target brief (which is as follows):

"Taking the plans for the redevelopment of the Guildhall, produce an animation to show how the new building works will look when finished, incorporating an architectural walk through of the renovation work, and show how different groups in the community will utilise the restructured hall."

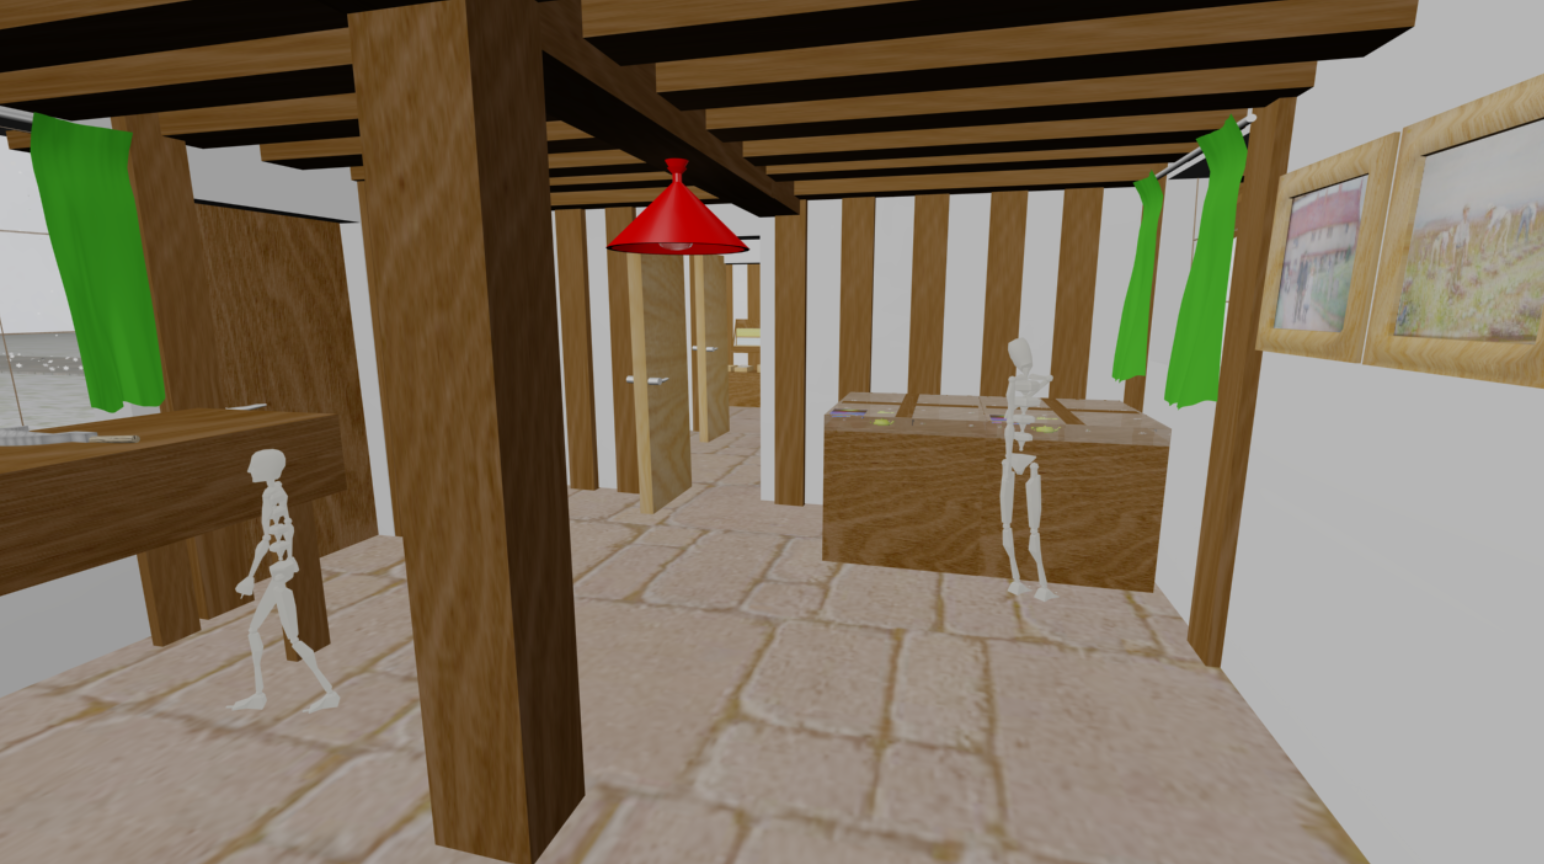
The Slice tool was used to show the transition between the old and the new building. Cameras were positioned carefully around the entirety of the model and 3d models and animations were included to show how the community would use the Guildhall how it will be after the renovations have been complete. Seasons were added to provide more reason to display our skills and to allow more techniques to be used, such as the Snow tool and modifiers for creating grass/snow environments, different lighting conditions and also the smoke and fire particle effects for the fireplaces during the Winter. Research was conducted into how the Guildhall will be used, allowing us to discover enough information to create and incorperate a voice over which support the modelling and animation work that has taken place.

Strengths of our animation
  • Many different techniques have been used to show case our knowledge base in 3D Studio Max and other related programs.
  • It conveys the message in both a visual and audio form which makes it easier to take the information in.
Weaknesses of our animation
  • May be too long for a short clip, however it does convey a lot of information which could be too much to take in on one sitting.
  • Different renovation plans obtained at the halfway stage meant that many adaptations had to be made, meaning that time was cut and smaller models could not be given as much detailed as we would have liked.
Future Work/Improvements
  • Reduce the amount of information and condense it so that only the vital facts are conveyed over the voice over.
  • Ensure that all research has been completed before the development of a project proceeds, avoiding having to restart the project and delaying other pieces of work.
  • Ensure that extra time has been allocated in the Gantt chart in case any issues should arise which could take longer to rectify.
Evaluation of Group Work

Discussion

During this module, it has been based mostly on group work and how well you can work in a group and complete the tasks set. You have to ensure that you can keep on schedule and manage your time correctly or otherwise you will not meet the deadline.On the whole, I believe that we kept to the deadline fairly well, considering there were issues for the whole group on the other 40% of the module which meant that we could apply for an extension. However, the time gained has been utilised properly and we did not have any major issues regarding how well we worked as a team.

Strengths in Group Work
  • All group members communicated between each other outside lessons, whether it be via blog, email or mobile telephone.
  • All individuals participated an equal amount of their time and effort into creating the final animation.
  • All individuals have their own strengths within a group and when combined, we managed our work load much better. The Gantt chart was followed right up to the deadline date which meant that the work was handed in on time and quality of work standards were high.
Weaknesses in Group Work
  • Not all group meetings were attended to on time due to member illness or other commitments. This meant that time was wasted on a couple of occasions when other work could have been completed instead.
  • Work was carried out in all different versions of the main Guildhall file, which confused some group members and meant it was more time consuming to merge and import individual pieces of work.
Teamworking Skills Used and Improved
  • Communication skills - by helping each other and by form of presentation to an audience.
  • Listening skills - by listening to each other to learn and improve our individual work.
  • Confidence levels in our own work and each others work.
Future Improvements
  • Ensure that if some group members cannot attend group meetings, they should let the group leader know as soon as possible so that alternative arrangements can be arranged so valuable time is not lost.
  • Ensure that all group members work using the same base file to make it easier and less time consuming to compensate for mistakes.
    Evaluation of My Own Work

    Discussion

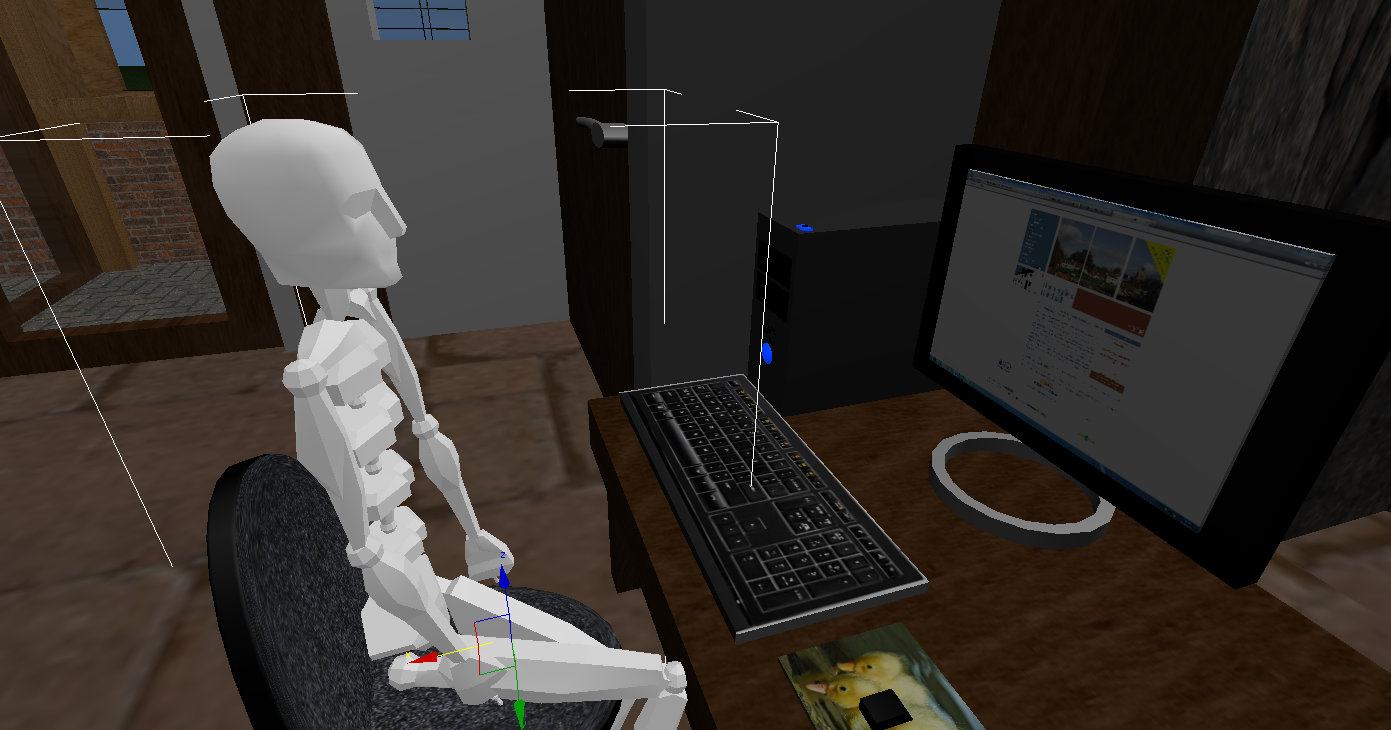
    As team leader, I was responsible for completing the majority of the paperwork, time management of the group, organising group meetings and writing up the minutes of meeting. However, I was also told by my tutor that I should demonstrate my skills and helo out more in the production of the final animation. Taking this into consideration, I made the majority of the interior models. I learnt new skills in the form of Raytrace materials for the windows, lightbulbs and , the use of Particles for the fire, and the Snow and Blizzard Tools in order to make the snow for the Winter scene in the animation. As well as documenting this, I also created bipeds (with meshes to begin with although that plan did not work out as expected) which were positioned around the Guildhall and animated to show how the Guildhall works.

    This semester, I ensured that I had 100% attendance and that I also came into university on other days as well to hold group meetings and do additional work. This definitely helped because it meant that I was present in every stage of production and could help guide my group to produce a successful animation.

    My Individual Strengths
    • 100% attendence meant that I did not miss any group meetings and could ensure that the work was completed on time and to a high standard.
    • I took control of the group's time management and therefore got us to complete the project comfortably.
    • I communicated with all group members effectively, even when they did not attend lessons to ensure that we were still on target.
    • All work completed was to the best of my ability.
    My Individual Weaknesses
    • Limited knowledge of 3D Studio Max when I first started out because I missed the majority of my animation work last semester due to illness. 
    • Home computer did not match up to the specifications required to render so many polygons in 3D Studio Max so another group member had to render my scenes for me. 
    My Improvements For The Future
    • Take some time before the project begins to research any tools or software which I am not very familiar with as this will save time in the project for either asking other people for help or researching partway through the project.
    • Know the capabilities of the hardware and software that I am using in order to prevent software incompatibility issues in the future.

      Finished Result

      The screen shots below show the finished version of our Guildhall clip in various stages:

      This is the front view of the Guildhall in "Summer" view:


      There is a transition as the Guildhall is changing from the old building to the new building, the weather changes to Winter. The sky changes colour and a snow effect has been implemented. The ground also changes colour to reflect snow on the ground.


      This is the disabled toilet which is easily accessible to the public. The door swings open as an animation and a camera traverses the inside.


      The camera meets up with another camera inside the shop. Although I wanted to animate the bipeds in here for the final project however it was taking too long to render because we have the snow animation still running outside.


      This is a biped showing how the touchscreens are used in the museum and the room joining the shop and the museum area:


      This is the museum area, with bipeds looking at all of the artifacts on show. A child biped walks from one side of the room to the other.


      Two friendly bipeds and a biped sitting near the fire, enjoying the atmosphere:


      Walkway between buildings:


      Biped using the computer and the fast broadband access. Can also see the double fireplace:


      This is the library:


      Another view of the library, you can see a biped looking at the books available to the public:


      This is an image of the landing, just above the staircase:


      Public toilets. There is also running water coming from the tap:


      This is another view of the top of the landing:


      This is the main Guildhall area. The way that the Guildhall designs were interpreted, beams came right down to the floor of the building:


      This is the kitchen area where food is prepared for the visitors of the Guildhall:


      The video finishes with the camera looking out of the window, so you can see the snow falling and the church in the background:

      Creating the Animation in Premier Pro

      I was originally going to create the final video for the animation in Premier Pro, however the renders were far too large to transfer over from Adam's rendering computer, therefore he did it instead.

      Voice Over

      We felt that creating a voice over for the Guildhall animation was vital because it would help the audience understand what is going on and would feed more information about the Guildhall, seeing as not much information can be portrayed in a short clip. As team leader, I also thought this would be a great opportunity to unify us as a group and display all members working towards the final project.

      In order to create the voice over for the Guildhall animation, we all took seperate recordings of our voices reading out individual parts of the script. These were then send to me and I edited them in Audacity. This was by no means an easy task because there were many pauses and quite a few retakes were made in order to create the final piece. Although the majority of imperfections have been removed, there are a few incidences of the person reading intaking breath as they start a new sentence. I believe this is a good thing because otherwise it would be too "perfect" and come across robotic, which may slightly alienate the audience.

      The image below shows the final script in Audacity: 


      I had to make the best with Adam's voice clip because there was a lot of interference in the background and when I used the Noise Reduction tool, it altered the volume of his voice in certain areas. However, you can still understand what he is saying. If I had more time, I would have asked all members of the group to come into university and record it on equipment there, where there will be less noise interference. However, due to other commitments, it was simply not possible under the time constraints.

      The next step will be to adjust the cameras created by another group member in the Guildhall so that they follow the script. This file will then be imported, along with the final render of the Guildhall into either Windows Movie Maker or Adobe Premier Pro, where the final adjustments will be made (for example, adding a title screen and credits).

      Thursday 8 December 2011

      My Animations

      Snow Effect:

      The reason why we decided it would be a good idea to incorporate snow effects into our animation is because:
      1. It shows varying uses of different tools and techniques. 
      2. We have incorporated smoke and fire effects into the building which realistically, would only be in effect during the Winter. To make the animation more realistic, we felt it would be appropriate to work changing seasons, with Winter being signified as snow. 
      There are two main ways that snow can be created in 3D Studio Max. By using the snow tool or by using the blizzard tool. I experimented with both and the videos below demonstrate the differences within a 10 second render:

      Blizzard Tool

      Snow Tool

      The Blizzard tool is more appropriate for scenes which have fewer polygons on the rest of the animation because many polygons need to be created in order to make it look realistic. The main issue I discovered is that it did not seem to fall as realistically as normal snow because snow seems to be moving faster towards the front of the scene and slower towards the back. 

      The Snow tool looked more realstic, however in the video above, I did not include enough polygons to fall. 

      The video below is a 30 second render of the snow with more polygons and reflects similarly to what will be appearing in our final render: 


      Importing into main .max file

      The image below shows the snow imported into the main .max file:


      As you can see, the amount of snow produced is ideal, however due to the external lighting, some snowflakes appear to be black. This can easily be corrected by modifying the environment lighting to make it more suitable.

      The video below shows my snow incorporated into one of the camera scenes from our actual finished result. It has been combined with another group members use of deflectors to make the snow stay on the roof:

      Biped moving:

      Although it was a setback that my original biped with the mesh attached could not be used, by not redoing them and opting to just use a simple biped instead. Although all bipeds were initially animated, due to the length of time it took to render my scenes, I had to regretfully remove the animations on the following bipeds: 

      The first biped positioned was the cashier in the Guildhall shop:


      The second biped created was the customer and in the image below, you can see the customer buying merchandise and handing it over to the cashier so it can be scanned and paid for.This is to demonstrate how people can use the Guildhall shop.


      The third biped shows how the touch screens in the museum work.


      The fourth and fifth biped show a friendly couple looking at the artifacts to demonstrate that the Guildhall is appropriate for everyone to enjoy.

      The sixth biped has been placed in the library, looking at all the books they have displayed. This is to emphasise that there are lots of books for everyone to enjoy and read.

      The seventh biped is seated near the fire, relaxing and enjoying the quiet atmosphere.

      The eighth biped is seated in front of one of the computers to show how they are used.


      I created a smaller child biped which I animated in order to keep the render length as low as possible, as proof that I know how to animate bipeds successfully.


      The bipeds have been concentrated on the lower part of the building. This is because the lower part of the building will be utilised the most and the majority of our animation will be centered around the library, the museum and the Guildhall shop.

      Fire Effect:

      For some reason, the video will not upload onto the blog so here is a screen shot:


      Thursday 24 November 2011

      Update Of Project

      Here is the Initial Gantt Chart which I created at the beginning of the group project:


      Due to issues within the module, we applied for an extension until the 21st of December which has since been granted. This means that we can update the Gantt Chart to accomodate this extra time so that we can use it wisely in order to achieve our full potential. Although we were not behind in this section of the module, it has meant that some of the areas we would have either pushed to have completed or had to rework to save time can now be accomplished, hopefully allowing us to achieve a higher grade. The main part of the project which has been affected is the amount of time allocated for the animations and write up. This has been extended by two weeks as this will be ample opportunity to express our animation techniques, research new techniques and tie up any loose ends.

      The image below shows the new and updated Gantt Chart:


      Model of the Silhouette

      In order to show how the Guildhall will be used after the renovations have been taken place, we are going to implement silhouettes to move around the guild hall and to interact with some of the other models. In order to increase my knowledge base, I asked my tutor how to showcase more of my modelling and animation techniques. I used the biped tool instead of the bone tool because it produces better results in the final render. 

      The first thing I did was create and TurboSmooth the mesh of a human. The next step was to create a biped that was approximately the same size as the mesh I had created (see image below):


      I moved the biped into the centre of the mesh and I increased the size of the bones so that the skeleton fills up the majority of the mesh, giving the most realistic human movement. It does not matter if the biped extends outside the mesh slightly because in the final render, the biped will not be visible. It is merely just to recreate human movement. In order to make the process easier, I made the mesh see-through and froze it into position. That way, the mesh cannot be selected. The image below shows the biped correctly positioned inside the mesh: 


      A skin had to be enveloped around the biped and mesh so that the two worked together as one object. Now, when the mesh moves, the biped moves too, creating realistic movements. I applied a black finish to the silhouette and it is now ready to be animated and utilised in the Guildhall animation.


      Merging into the Guildhall Main Building file issues

      When the biped was merged into the main building .max file, it was far too large and needed to be scaled down. Once a biped has been connected to a mesh, it cannot be simply resized like other objects. Therefore, it had to be scaled down. The image below shows how tall the biped would have to be in order to look more human sized. 

      However, after I had entered the biped and mesh properties and scaled it, parts of the biped did not function anymore, rendering the model useless. Due to time constraints, I did not have time to create a new mesh so I just used a simple biped with a bone texture to make them look like skeletons:


      -------------------------------------------------------------------------------------------------------------------
      References


      Filter Forge
      2011
      Bone texture for biped
      Available online at: http://www.filterforge.com/filters/414.html
      Last Accessed: 19/12/2011

      YouTube
      2011
      YouTube video to show biped rigging and how to fit a biped inside a rigid mesh
      Available online at: http://www.youtube.com/watch?v=si4N6IdlJq8
      Last Updated: 19/02/2008
      Last Accessed: 19/12/2011

      Script To Go With Storyboards


      Hello everyone and welcome to the Finchingfield Guildhall short renovation clip. We hope to demonstrate to you how the renovations have been implemented and how the Guildhall will now be used in order to entertain and educate people young and old on the only secular building available to the public.

      Over many seasons, the building work has finally been completed, so let’s take a look inside!
      Here we have the entrance to the guildhall and the shop. Firstly, you can see that we have easily accessible toilets which have been positioned near the entrance/exit for practicality. Right, into the shop. The shop is used by the whole community, including school children not just from the local areas but from other boroughs as well. We have stocked lots of inexpensive merchandise such as pencils, rubbers and notepads with the Guildhall logo on them to remind the purchasers of their visit to this historic building. The shop also stocks pieces of work from famous novelists such as Dodie Smith, the mastermind behind “101 Dalmatians” and Norman Lewis who wrote “Naples 44”. A watercolour collection by Arthur Legge will also be available in the shop too.

      Now we are moving from the shop to the Museum area. Arthur Legge’s daughter, Phyllis, designed a map of Finchingfield and the original was given to the Guildhall. This has been printed on the modern lino which covers the floor in the temporary exhibition area of the Museum. This area joins the shop to the Museum and the space will be used in the future so that local groups and societies can give educational talks and displays to the public.  

      In the main museum area, the various items will be displayed in a series of glass tables with interactive touch-screen technology. This will promote learning by displaying the objects in their best possible light and help explain the history behind this ancient building. The technology used in the glass tables is inspired by the Darwin Centre in the Natural History Museum and the aim of using this technology is to make it easier to change the content of the displays more frequently, therefore making the museum a fun, family-friendly, interesting place to visit and learn from. There are also speakers situated throughout the museum area which will play recordings about the history of Finchingfield, particularly about what the village used to be like when there was a more agricultural-based economy. This would be interesting for the older generation so they can reminisce on the “good old days” and for the younger generation to gain an idea on what life was like before they were even thought of!

      Moving on to the library, there is a massive stock containing a variety of different books which will interest anyone who visits. The idea is to create a cosy room, with fireplaces to give a warm and welcoming atmosphere and sofas in order to encourage parents and children to read together in a quiet environment. Also in the library, there is a photocopier as there is not one available locally and it has been requested and greatly welcomed by the village occupants and computers with fast broadband access.

      That’s it for the ground floor, moving up onto the first floor.

      Here we have more toilets and baby changing facilities to meet the needs of visitors.

      Now, in the guild room, it has been restored to the original Guildhall layout and it can be utilised in many different ways and for various different uses. When the building was new, around 1470AD, it was used by the Guild of the Holy Trinity for religious purposes and as a school. The idea is to continue using this building in a multitude of different ways so that it can not only meet the needs of the Finchingfield community, but also the needs of other boroughs and nearby villages as well so they too can benefit from this unique building and its histories.

      Right, time for the kitchen. The kitchen is where all meals and drinks are carefully prepared for consumption by the visitors of the Guildhall. Prices are very reasonable and money will be used to help improve the Guildhall even further.

      Well that’s the new Guildhall! We hope you enjoyed our renovation clip!  

      Monday 21 November 2011

      Storyboards For Animating The Guildhall

       These are the storyboards which the group will follow in order to animate the Guildhall.


      Firstly, the clip starts showing the "old" Guildhall building before it has been renovated. It will be shown in the Summer so it makes it easier for the person looking at the video to see the detail in the exterior. There will be sounds in the background to indicate that it is Summer, for example birds singing.

      Depending on the amount of time we will have, the original idea was to have a clock appear in the middle of the screen showing the seasons. The background scenery will change from Summer to Autumn (Orange sky, orange/brown trees and leaves on the floor) and then to Winter, where a slice modifier will be applied and the new building will be revealed. The reason why we felt that the season changing was important was because not only does it symbolise that the renovation works are being taken place, but it also gives us an excuse to show off other animation techniques. For example, we have created fireplaces with working flames and smoke. However, these will not be lit during the Summer periods. Also, we felt that the Guildhall could be used more in the Winter months as it is a warm place for the community to visit and explore. We are hoping to create a snow effect too and the lights will be illuminated inside the building to give a welcoming feeling.

      A silhouette will be walking down the path and as it approches the doorway, the camera pans round to focus on it. The video will be based on a human eye's account of the renovations that have taken place.

      The next couple of drawings show the silhouette's movement throughout the building. It may or may not be used in the final clip. It really depends on the effect that we are tryiong to create. As a minimum, it is a guide to us as developers to plan where the path will be set for the silhouette.

      4a through to 4h shows how each of the components can be animated in order to show how the Guildhall works and how the public will be able to interact with it. Due to time contstraints, we may only be able to use the same silhouette feature. In an ideal world, we would have created individual people models and used them instead to show off some of our other techniques. However, our main focus is getting the building itself finished on time.

      At the end of the tour, the silhouette will approack the exit and a "Fade To Black" screen transition will be applied. Scrolling credits will complete the clip, along with our group SID numbers and thanks to the Guildhall society for letting us tour the building and gain valuable firsthand experiences. There will be a voice over throughout to explain what each part of the Guildhall does and how it will be utilised.

      We aim to use Windows Movie Maker to add transitions and add the voice over. The voice over may have to be edited using software such as Audacity to ensure that it fits in with the clip. The aim is to get the clip to last no longer than 5 minutes because it will simply take too long to finish rendering. 

      Script follows this blog post.

      Other Components I have Made

      Church:

      The church was created to go in the background of the render because at one point in the animation, the camera will be positioned out of one of the windows across the street. We felt this would be a nice touch and it would also prove that the windows that I have created work how they are supposed to (so you can see out of them!) 

      The first image shows the church in its most basic form. It has been created out of various primitive box shapes, cylinders and pyramids. 


      Each of the individual parts then has to be recoloured to fit in with the actual building: 

      Taken from my camera - 30/09/2011
      Since there were no suitable images on the Internet or that were taken on our field trip to Finchingfield, it meant that I could not use the UVW Map Tool like I had anticipated. Therefore, I had to find all the appropriate materials online. 

      The image below shows the finished result pre-render. I am quite happy with how it turned out considering I had to change plans. The stone material had a Bump modifier added to it to make the stones stand out even more from their background.


      The image below shows the church from the window in the Guildhall.


      Museum: 

      Interactive Display Cases

      One of the key rooms in the Guildhall is the Museum. It will hold artifacts which are invaluable to the guildhall. Therefore, they will need to be displayed appropriately. After contacting a member of the Finchingfield Guildhall committee, we discovered that they intend to use touch-screen technology inspired by the Darwin Centre in the Natural History Museum. The image below shows the technology used in the Darwin Centre:

      Image taken from: http://www.telegraph.co.uk/travel/picturegalleries/6168481/Natural-History-Museums-Darwin-Centre-Sneak-peek.html?image=4

      As you can see, it features glass boxes which contain the artifacts on the wall with interactive touch-screens which provide the vistors with futher information. 

      So when it came to creating a display case , it was vital to incorperate:
      • The glass boxes containing the artifacts.
      • Interactive touch screens with artifact information.
      • Lighting effects inside the display case to show artifacts to their best possible effect.
      To create the main structure of the display case, I used box primitive shapes. I then used raytrace materials, which I have never used before, in order to create a realistic glass effect and applied it to the outside of the display case. This meant that when any items were stored inside, they would be reflected and refracted according to the light in the environment.

      The image below shows the basic structure:


      Spheres which also have a raytrace material added and have self illumination selected will act as mini lights in the display case which will not overpower the natural lighting in the environment. A "touch-screen" device has then also been added to the case. The image below shows an example of this:


      The image below shows the finished result:


      Artifacts
      This is just an example of the kinds of artifacts included in the interactive display cases.


      Toilets: 

      Toilet Roll

      The toilet roll and holder was constructed out of primitive shapes. A metal effect has been placed on the holder made out of cynlinders and alligned using the rotate and move tools. A tube was used for the actual roll and a small plane was used as a finishing touch. The purpose of this object was to make the toilets look more realistic. 


      Main Guildhall Building:

      Windows

      When the windows were created, a new skill was obtained. The outside of the windows was made of a wood texture which was then applied only around the edges. Then, I laid a plane shape over the top and modified the material. This time, I used raytrace materials, the same material used for the glass in the display cases and the light bulbs (see below). This allowed me to make the glass transparent and to add a slight reflection and reflaction property, making it act in a similar way to real glass does.

      The image below shows the final result after it has been rendered: 


      The windows will be used throughout the Guildhall building, therefore are a vital object in the creation of the Guildhall model.

      Lighting

      Lighting is a major part of the Guildhall because without it, we would not be able to see all of the contents in all their glory! Firstly, I created the lamp shade by creating a base outline in Adobe Illustrator:

      It was then imported into 3D Studio Max. I had to ensure that the pivot point was in the correct place because otherwise, when the Lathe Tool was used, it would lathe in the wrong place and would look completely different to the desired result. After using the lathe tool, I applied a bright colour to make it stand out.

      Next, I had to create a light bulb to go inside the lamp shade. This was created using the exact same method as described above. This is an image showing the Adobe Illustrator drawing:

      The image below shows the finished result after both shape have been created:


      The next step was to add a raytrace material to the lightbulb to make it look transparent and more realistic so that light emitting from it can be refracted. The material used was slightly differently to the two cases mentioned above. The idea is to ensure that light is allowed through the bulb and is refracted. However, reflection had to be kept to a low because otherwise the light would reflect the colour of the lamp shade.

      After rendering however, the lightbulb shone through the lampshade, even though the lampshade was set as opaque. This could have been because the type of light used was omni, therefore it was chanegd to a spotlight. 


      The image below shows the light changed. This looks much better than the image above. However, The bulb is too far down so it was moved up.


      The image below shows the final result, which is much more realistic:


      Guildhall Shop: 

      Cashier

      The cashier was a vital part of the production of the Guildhall shop. It is mainly created of box primitives which have been converted to editable ploys and manipulated so that they form a more rounded and realistic shape. Buttons for the cashier were created by using the UVM Map modifier with a very flat box primitive. This is to make the buttons look more realstic, rather than using a completely flat, 2D plane.

      Merchadise for sale

      After getting into contact with the committee in Finchingfield, we discovered that they would be selling small gifts in the shop because they want to ensure that they are affordable for the children who visit on school trips. Items like pencils with the Guildhall logo, rubbers and notepads will be sold.

      The image below shows the items in their most basic form. The rubbers and books are simply box primitive shapes. The pencils are slightly more complex though:


      The pencils are slightly more complex though. They have been created from a cylinder which has been converted to an editable poly. The segments were increased so that the middle sections could be extracted out to form the top of the pencil. A cone was then created and inserted in the top of the cylinder shape and materials were added to produce the image below:


      After a label was added by using the Guildhall logo and UVW Map, multiple copies were created a grouped to make them suitable for placing in the shop:


      The image below shows all of the merchandise together after it has been rendered.


       -------------------------------------------------------------------------------------------------------------------
      References

      Blogspot
      2011
      Concrete for church pillars
      Available online at: https://blogger.googleusercontent.com/img/b/R29vZ2xl/AVvXsEiJBeK59K-OJfRGmyYYHBnNhXN7teIFDDnawSnXLNJnyPixBKtzBruIbtKD6VMIx3jgyeGHlkjSFP0LBNCqDXI6M44XoCiCjHhv0WrDPxaJvOqYTdKg0pq9YjeOjQTmBjTLvYSw9685K6Dr/s400/concrete.jpg
      Last Accessed: 19/12/2011

      Daily Telegraph Online
      2011
      Available online at: http://www.telegraph.co.uk/travel/picturegalleries/6168481/Natural-History-Museums-Darwin-Centre-Sneak-peek.html?image=4
      Last Accessed: 19/12/2011

      Finchingfield Guildhall Trust
      2011
      Finchingfield Guildhall logo used on merchandise
      Available online at: http://www.finchingfieldguildhall.org.uk/images/LogoWordsRedBarw624Shop.jpg
      Last Accessed: 19/12/2011

      Flickr
      2011
      Clock face for the front of the church tower
      Available online at: http://farm3.static.flickr.com/2389/2492423217_af1252613e.jpg
      Last Accessed: 19/12/2011

      Fotolibra
      2011
      Stone texture for church walls 
      Available online at: http://gb.fotolibra.com/images/previews/642620-stone-texture-014.jpeg
      Last Accessed: 19/12/2011

      Public-Domain-Image
      2011
      Texture for red roofing to go on the back of the church building
      Available online at: http://www.public-domain-image.com/public-domain-images-pictures-free-stock-photos/objects-public-domain-images-pictures/red-roofing-tiles.jpg
      Last Accessed: 19/12/2011

      Wall Sticker Outlet
      2011
      The sandy wood colour used for the pencil texture
      Available online at: http://www.wallstickeroutlet.com/Images/york-lt-tan-wood-texture-2.jpg
      Last Accessed: 19/12/2011